Know Your Role
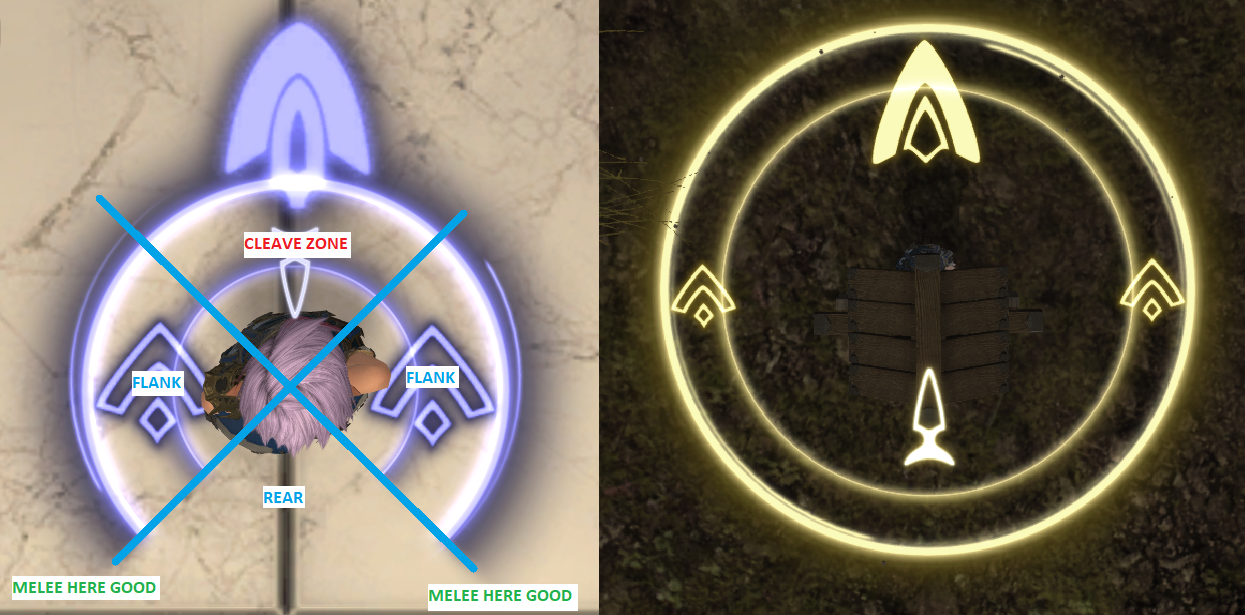
Melee DPS jobs have a unique mechanic in positionals. Certain actions will deal more damage when executed from the rear or flank of a target. Targets with continuous Target Rings will always take the increased damage from positional actions.
The Role Action True North allows you to disregard positional requirements for ten seconds per use.

While it is a loss to miss your Positionals, landing them should be your last priority, after you have met all of the other combat priority requirements of a melee DPS job. These are listed in order from largest to smallest loss of damage if you fail that level.
- Handle Mechanics
If you fail mechanics, you could cause a potential raid wipe and a fight reset. You do not want to be the cause of that. Nothing is more important than properly handling mechanics. - Stay Alive
Don’t die. Plain and simple. If you have to sacrifice uptime to not die, you know the choice to make. Deaths cause much larger losses than missing a GCD or two. - Maintain Uptime (ABC - Always Be Casting)
Stick to the boss like glue, assuming you meet one and two. Don’t let your GCD stop spinning. - Land Positionals
And then, once you have one through three down, worry about maintaining proper positionals.
Defensive actions like Feint and Arm’s Length as well as healing actions like Bloodbath and Second Wind help you stay alive in solo and group content.
Leveling Rotations
| Form |  |  |  |
|---|---|---|---|
| Spender |  |  |  |
| Gainer |  |  |  |
| AoE |  |  |  |
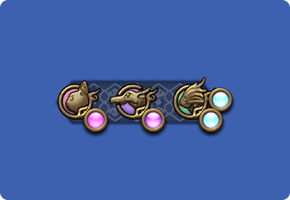
At its core, Monk’s rotation is about progressing through your three forms; Opo-Opo, Raptor, and Coeurl. At each step you have three different GCDs to choose from; a Spender GCD, a Gainer or generator GCD, or an AoE GCD. At the center of the decision process between the Spender GCDs and Gainer GCDs is the new fancy gauge that Monk has received in Dawntrail.

Your Gainer Gcds, namely Dragon Kick, Twin Snakes and Demolish, will grant full Beast Fury stacks (affectionately called “Balls”). Your Spender GCDs can spend up to 1 Ball on each use, granting increased potency if they succesfully spend a Ball. The Spender GCDs are Bootshine, True Strike and Snap Punch, which at Level 92 will receive their upgrades, Leaping Opo, Rising Raptor and Pouncing Coeurl, aptly named after the respective form they can be used in. The Goal is to use Spenders while Balls are available in the respective Form, and use Gainers while no Balls are available to fill the gauge back up.
Your AoE GCDs are worth using on 3 or more targets.
As you level up, you’ll slowly gain access to new skills, fleshing out your rotation as you go.
From Levels 1 - 17 you only have access to the Spender GCDs, Bootshine, True Strike, and Snap Punch while you get used to progressing through your forms.
At level 18 you gain access to Twin Snakes, your first Gainer GCD. While cycling through the Opo-opo, Raptor and Coeurl Forms, you can use Twin Snakes in the stead of True Strike in the Raptor Form to generate yourself 1 Raptor Ball (“Raptor’s Fury”), which you can spend on True Strike the next time you cycle through the Raptor Form to enhance the potency of True Strike.
At Level 30 you gain access to Demolish, your second Gainer GCD. Similarly to Twin Snakes, Demolish can be used in the Coeurl Form and generates 2 Coeurl Balls (“Coeurl’s Fury”), which can be spent on enhancing the potency of Snap Punch.
At Level 50 you gain access to Dragon Kick, fully fleshing out your six core GCDs. As with the other Gainer GCDs, Dragon Kick will grant you a Opo Ball (“Opo-opo’s Fury”)
You will also gain Arm of the Destroyer, Four-Point Fury, and Rockbreaker at levels 26, 45, and 30 respectively. As mentioned before, these skills are worth using when you can hit three or more targets.
Chakra
At Level 15 you will gain access to Meditation, allowing you to build Chakra. You can build up to five stacks of Chakra, and then spend them on either a single target or a line AoE oGCD. Meditation should be treated as a downtime tool that you only use if you are unable to hit a target.
| Single Target | Line AoE |
|---|---|
 |  |
 |  |
At Level 15 you can spend your Chakra on Steel Peak. This will upgrade to The Forbidden Chakra at Level 54.
At Level 40 you will gain access to Howling Fist. This will upgrade to Enlightnment at Level 74.
Steel Peak has a potency of 180 vs Howling Fists’ 100. This means Howling Fist is worth using over Steel Peak at two or more targets.
The Forbidden Chakra has a potency of 340 vs Howling Fists’ 100. This makes Howling Fist worth using over The Forbidden Chakra at four or more targets.
Finally, Enlightenment has a potency of 170. This breaks even with The Forbidden Chakra at two targets, becoming a gain at three or more targets.
Buffs


Perfect Balance and Blitzes


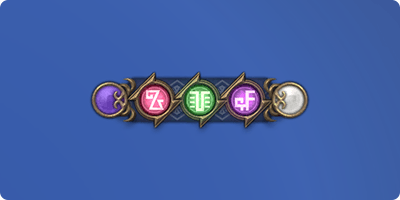
The Master’s Gauge has two aspects; the three Beast Chakra orbs in the centre, and the two Nadi on either side. Using a GCD under Perfect Balance will fill up a Beast Chakra of the respective Form; Bootshine would give an Opo-opo Chakra, Snap Punch would give a Coeurl Chakra, and so on.
Upon building up three Beast Chakra, Masterful Blitz will turn into one of four different type of GCDs.
| Elixir Field | Elixir Burst |
|---|---|
 |  |
By building up any three identical Beast Chakra (three Opo, Raptor, or Coeurl), you will be able to use Elixir Field, which will fill up the Lunar Nadi on the Master’s Gauge. Elixir Field upgrade to Elixir Burst at Level 92.
| Flint Strike | Rising Phoenix |
|---|---|
 |  |
By building up one of each different Beast Chakra, you will be able to use Flint Strike, which will fill up the Solar Nadi on the Master’s Gauge. Flint Strike upgrades to Rising Phoenix at Level 86.
| Celestial Revolution |
|---|
 |
By building up two different types of Beast Chakra (two Raptor and one Coeurl, two Opo and one Raptor, etc.), you will be able to use Celestial Revolution, which will fill up the Lunar Nadi on the Master’s Gauge by default, but if you already have a Lunar Nadi then it will fill the Solar Nadi instead.
| Tornado Kick | Phantom Rush |
|---|---|
 |  |
| When you have both a Lunar and Solar Nadi, Masterful Blitz will turn into Tornado Kick, regardless of the Beast Chakra you build. Tornado Kick upgrades into Phantom Rush at Level 90. |
These Masterful Blitz GCDs are in general very powerful and should, if possible, be fit into Riddle of Fire. The best practice is to generate Lunar Nadis with only alternating Opo-opo GCDs (Bootshine and Dragon Kick) as they are our strongest GCDs. After generating also a Solar Nadi using 3 different Forms, having both a Lunar and a Solar Nadi, allows us to do a sequence of any 3 Forms in the next Perfect Balance to gain the Tornado Kick or Phantom Rush Blitz. While any 3 Forms can be used, it is still recommended that these 3 GCDs are alternating Opo-opo GCDs.


